
Support Centre
Find the answers to your questions and get the support you need with the VentraIP help centre.
Browse by Popular

Domain Name
- What is a domain name?Eligibility criteria for registering .AU domain namesPremium domain names explained

Web Hosting
View All
Email Hosting
View All
Google Workspace
- Getting Started with Google WorkspaceGoogle Workspace support resourcesTransferring an existing Google Workspace service to VentraIP

Account
- How do I reset my VIPcontrol password?How do I create a VentraIP account?How can I see who accessed my VentraIP account?

Troubleshooting
- How do I clear my browser cache?Troubleshooting a ‘500 internal server' errorTroubleshooting with a ping test
Restoring databases using Acronis Backup
If you’re restoring a deleted database, please also see Re-adding the database user at the end of this guide.
Restoring a database
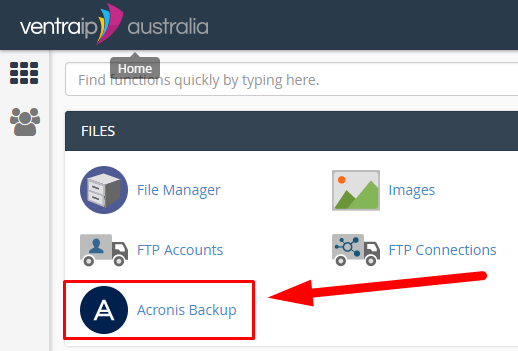
- Once logged in to your cPanel, select Acronis Backup.
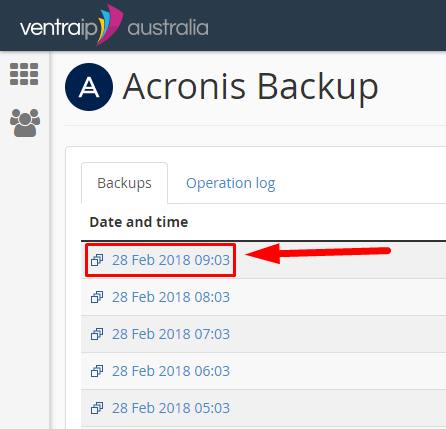
- On the next page, we see a list of available backup times, select a time that you would like to restore back to.
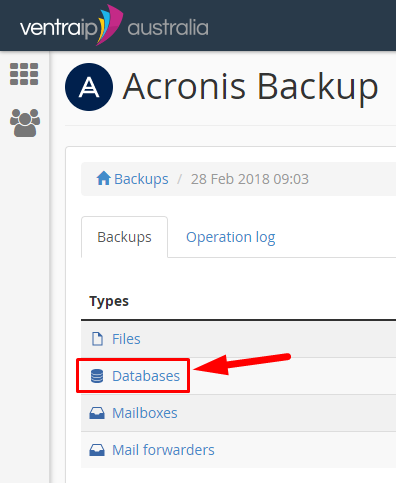
- On the next page, we can see our available restore options, we will select Databases.
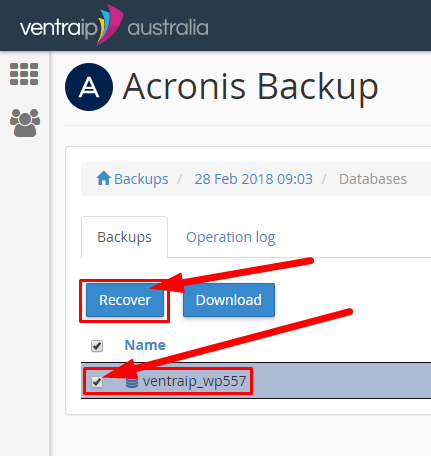
- Select the database you would like to restore, and then click Recover.
- You may now wait for your database to be restored, if you would like to check the progress click the Operation log tab up the top, this will show you if the restore is in progress or completed.
Once completed the orange ‘In Progress: Recover databases‘ will change to a green box that says ‘Succeeded: recover Databases‘.
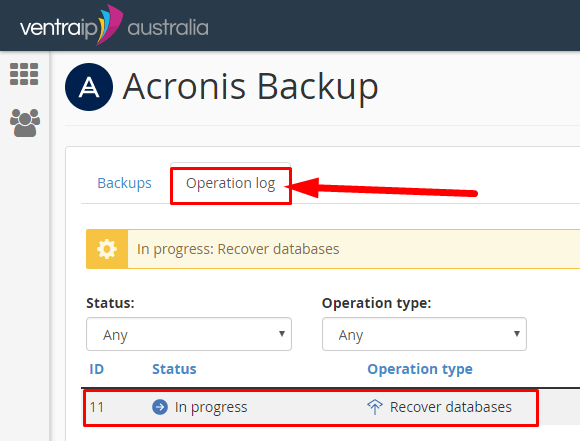
- You may refresh this page, once the status says ‘Succeeded‘ you know the database has been restored.
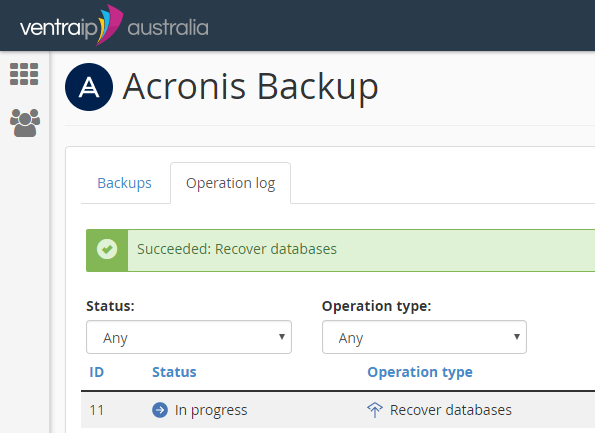
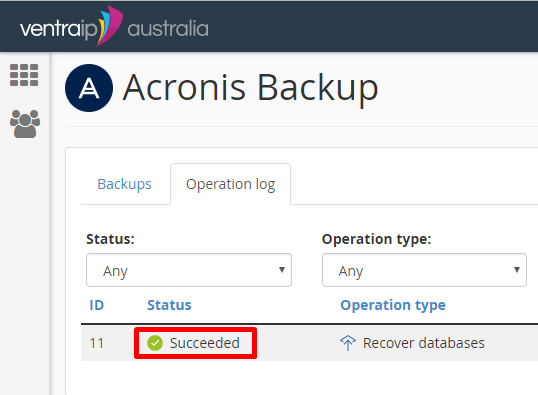
That’s it! Your database and all its data have been successfully restored!
You are now free to use your site as per normal unless you were restoring a deleted database, in which case below are the final steps.
Re-adding the database user
In the event that the database had been deleted prior to being restored, then we need to add a ‘Privileged User‘ to the database for your site to access it, the steps to do this are below.
- In your cPanel first go to MySQL® Databases.
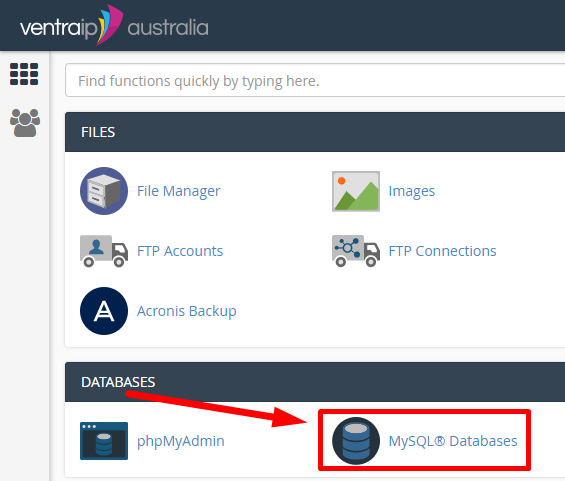
- Scroll down until you see the section ‘Add User To Database‘.
Here you must select the ‘User‘ that will be assigned to the ‘Database‘. Often the user and database name will match, but not in all cases. If you are not sure you will need to contact your developer. Once you have selected both from the drop down boxes click ‘Add‘.

- Check the box marked ‘ALL PRIVILEGES‘, then select ‘Make Changes‘.
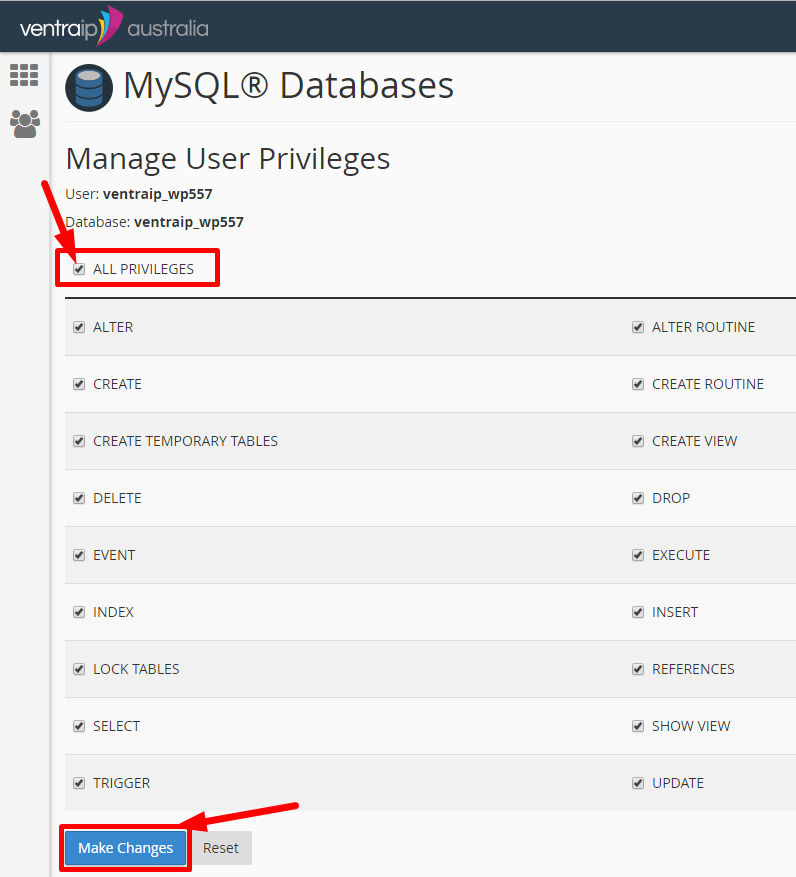
And you’re now finished, the database user has been assigned and granted privileges to use the restored database.

We Are Here to Help You
Get in touch with one of our local experts at any time.