Browse by Popular

Domain Name
- What is a domain name?Eligibility criteria for registering .AU domain namesPremium domain names explained

Web Hosting
View All
Email Hosting
View All
Google Workspace
- Getting Started with Google WorkspaceGoogle Workspace support resourcesTransferring an existing Google Workspace service to VentraIP

Account
- How do I reset my VIPcontrol password?How do I create a VentraIP account?How can I see who accessed my VentraIP account?

Troubleshooting
- How do I clear my browser cache?Troubleshooting a ‘500 internal server' errorTroubleshooting with a ping test
Creating an email signature in Axigen Webmail
If you’d like to create an email signature within Axigen, please keep in mind that the signature will only be used when you send emails from with the Axigen webmail interface. If you want to add a signature to emails you are sending from email software such as Outlook, that needs to be setup in the software.
Adding a new signature
- Login to the Axigen webmail interface
- Click on the settings (cog) icon
- Click Settings
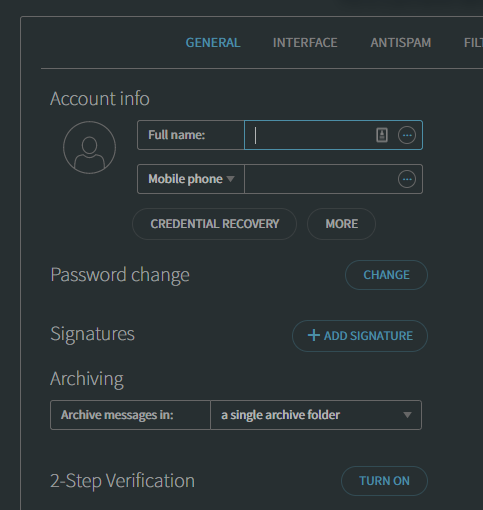
- Click Add Signature in the General tab

- Set a name for your new signature and fill out the Signature Body field with what you want your signature to be.
- Once you have finished creating your signature, click Add
How do I add an image to my signature?
This process is a little more complicated, as it requires you to input HTML code to make an image appear in your signature. If you do not at all feel confident doing this, you can enlist the help of a web developer to create the HTML code for your signature signature.
The code you need to add is as follows:
<img src="http://domain.com/path/to/image" alt="my image signature" width="100" height="100">
This is some generic HTML code that you need to make changes to, in order to make it work for you.
- src is the URL for your image
- width and height will determine how large your image appears
- alt is the alternative text that will be shown, if the image cannot be displayed for some reason
To input this code into your signature, you need to select the HTML edit option, and paste in the snippet.
